- elements:utilities
- introduction
- getting-started
- routing
- utilities
- elements:layouts
- elements:action-bar
- elements:components
- elements:dialogs
NativeScript Playgroundはクラウド環境です。基礎を理解するまで、ブラウザ上でNativeScriptとVue.jsに触れることができます。リンクから飛んで、ドラッグ・ドロップ操作でコンポーネントのコードを生成してみてください。
Playgroundは好きなだけ使うことができます。その中では、NativeScriptでの開発を試すこともできますし、プロジェクト全ての開発を行うこともできます。しかし、アプリをPlaygroundの外に出したくなったならば、次の段階に進んでNativeScriptのツールをローカル環境にインストールし、テンプレートを選んで始める必要があります。
このページは2つのパートを含んでいます:
パート1: Playgroundに親しむ
このリンクから飛んで、NativeScript + Vue.jsのとても基本的なテンプレートが予め読み込まれている、クラウド環境のシンプルなエディターを開いてください。
ヒント: Head to Sample Tasks for the Playground for ideas about how to get started in the Playgroundでどのように始めるかの考えとして向かってください????.
始める前に

Playgroundを初めて開く場合,2つのモバイルアプリ—the NativeScript Playground and the NativeScript Preview をインストールするように促されます。両者ともコードの変更をリアルタイムで実機に反映することを可能にするものです。コードのビルドは必要ありません。
アプリのインストールを飛ばすこともできますが、Vue.jsとNativeScriptで遊ぶ多くの楽しみを失うことになってしまいます。
コードを動かしているときは、アプリは起動したままにしてください。
画面構成
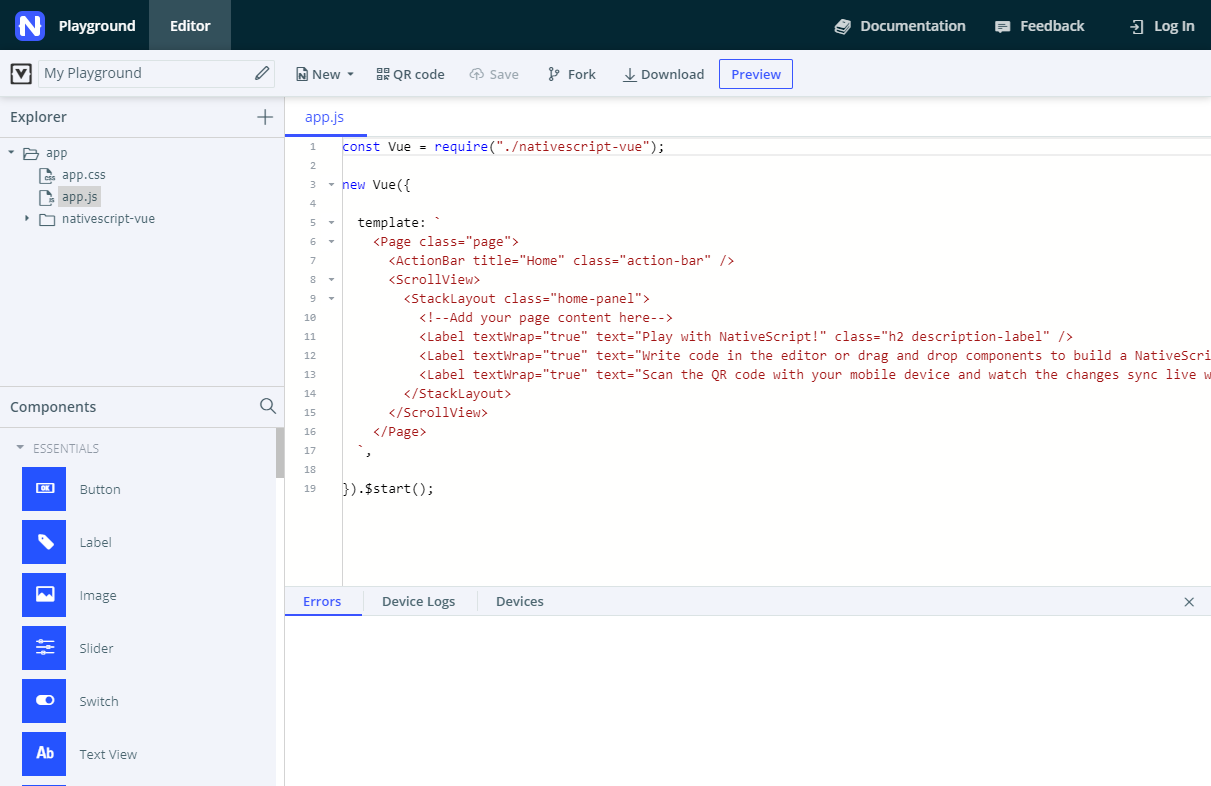
左側のサイドバーはファイルエクスプローラーとComponentパネルを提供します。アプリ上の多くの作業は、UIとロジックを作成するcomponents>HelloWorld.vueファイルで行われます。今の所は、より深い階層を編集する必要はないでしょう。
Componentsパネルでは設定が済んでいる全ての使用可能なNativeScript UIコンポーネントへの素早いアクセスを提供しています。
ページのトップから、あなたのデバイスのプレビューアプリへ変更の反映と、コードの保存、ダウンロードが可能です。
ページ下部には、リアルタイムのエラーレポートとデバイスログを提供する一番の親友がいますよ???。
ドラッグ&ドロップでコードの変更
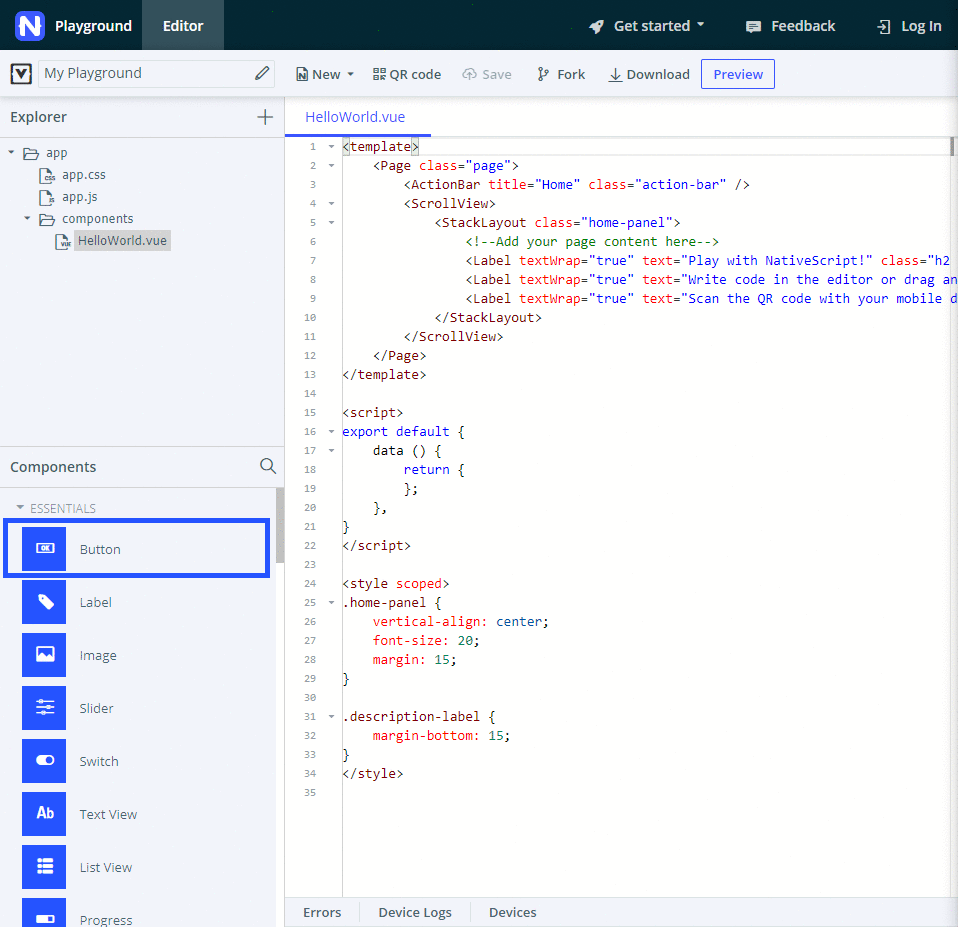
Componentsパネルのコンポーネントをクリックして、コードエディターでcomponents>HelloWorld.vueファイルの中にある、<template>ブロックのどこかへドラッグしてみてください。Releasing the mouse button inserts some pre-written sample code for the respective component. Any methods that go with it (such as what happens on button or item tap) are automatically added right below in the <script> block.
ヒント: 利用したいコンポーネントを見つけるためのに、Componentsパネルの検索機能を使ってみてください。検索機能はコンポーネントのタイトルのみに使用でき、コードの中で使われている本当の名前には使用できません。例: text fieldだと検索にヒットしますが、textfieldだと何もヒットしません。

多くのUIコンポーネントにおいて、それを動かすためにはyou need to drop them inside the <Page>ブロックの中、できればレイアウト用コンポーネントの中へドロップしないといけませんLayoutsがUIコンポーネントを画面のどの位置に設置するかを伝達してくれます。 tell your app how to position the UI components on the screen.
注意: 今の所、アプリのクラッシュもしくはロードされない場所へのドロップを止める機能はありません。このような場合に、より情報を得るためにはErrorsとDevice Logsタブを確認してください。
リアルタイムで確認する

正常な場所へコードを設置した後、Previewをクリック(もしくはCtrl+SかCmd+S) して、一瞬のうちにあなたのデバイス上の画面がリフレッシュされることを確認してください。
アプリと結びつけて動作させている場合において、当然アプリが閉じる場合があります。そんなときは、アプリを立ち上げなおしてクラッシュレポートを確認してください。
コードの変更がデバイスに反映されなくなった場合には、QR codeをクリックしてPlaygroundアプリでもう一度QRコードを読み込んでください。
Configure your codeコードの設定
これで、画面上ではコンポーネントが実行され、表示されるようになっています。You're excited but you want to make it your own自分の思い通りの形にしたいはずです。 Hack away at the default code suggested by the Playground. Fix sizes and labels, remove or add elements.
<style scoped>ブロックを下へスクロールして、スタイルを少し切り替えてみましょう。色とフォントサイズの変更を実験してみてください。
Part 2: Building an appアプリをビルドする
NativeScript Playgroundに目を通したならば、次の要件を満たすTODOアプリを作成するところから始められます:
基本的なデザイン
- 2つのタブによるレイアウト
- タブの1つで、アクティブなタスクを表示し、新しいタスクを作成
- 2つ目のタブで、完了したタスクのリストを表示
基本的な機能
- タスクの追加: タスクをテキストで追加
- タスクを見る: 新しく加えられたタスクはアクティブなものとして表示され、タップすることができる
- タスクを終える: アクティブなタスクをタップするとオプションを選択するアクションダイアログが表示されます。
- タスクを消す: 完了したタスクをタップするとオプションを選択するアクションダイアログが表示されます。
Advanced design
- Input and button for adding tasks are styled
- Tabs are styled
- Active tasks are styled
- Completed tasks are styled
ヒント: このチュートリアルの全てのセクションは、NativeScriptの基本がいくつかとRequirement implementation sub-sections. You can skip the basics sub-section and jump straight to the implementation for a more hands-on approachよりハンズオン的に進めるなら.
空のVue.jsテンプレート
このチュートリアルの全ての開発はcomponents > HelloWorld.vueで行われ、フロントエンド、ロジック、スタイリングのコーディングが含まれています。
HelloWorld.vue は、ロジックと結びついていないいくつかのラベルを中に含む、シンプルな<template>ブロックで始まっています。UIコンポーネントをドラッグ・ドロップするのにしたがって、Playgroundは<script>ブロックにコードを追加します。
<template>ブロックの中ではUIをデザインするために作業し、<script>ブロックの中ではアプリの機能を組み上げるために作業をします。<template>ブロックはNativeScriptと相性の良いXMLを記述する必要ああります。<script>ブロックではVue.jsとNativeScript JavaScriptの両者で記述できます。
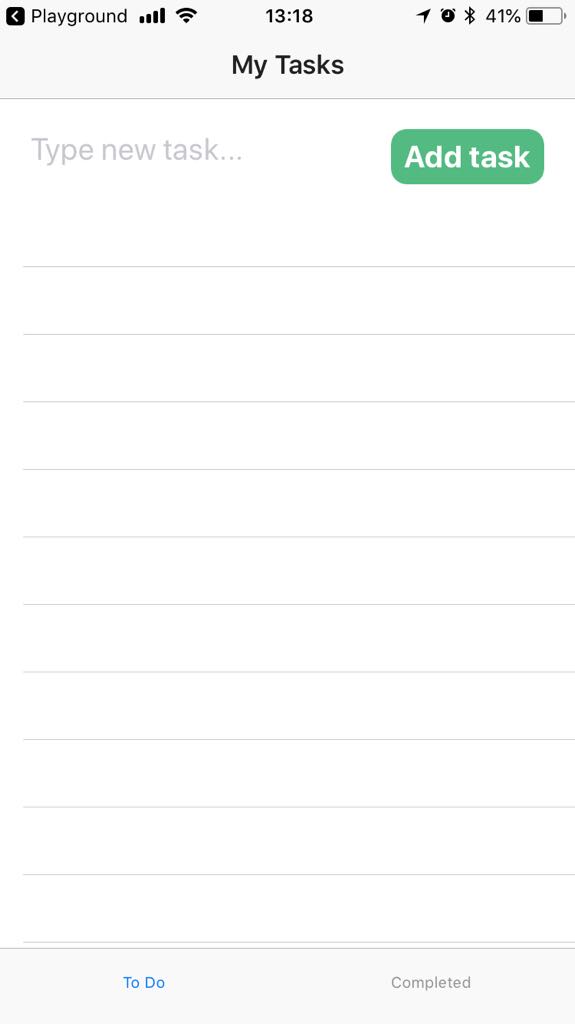
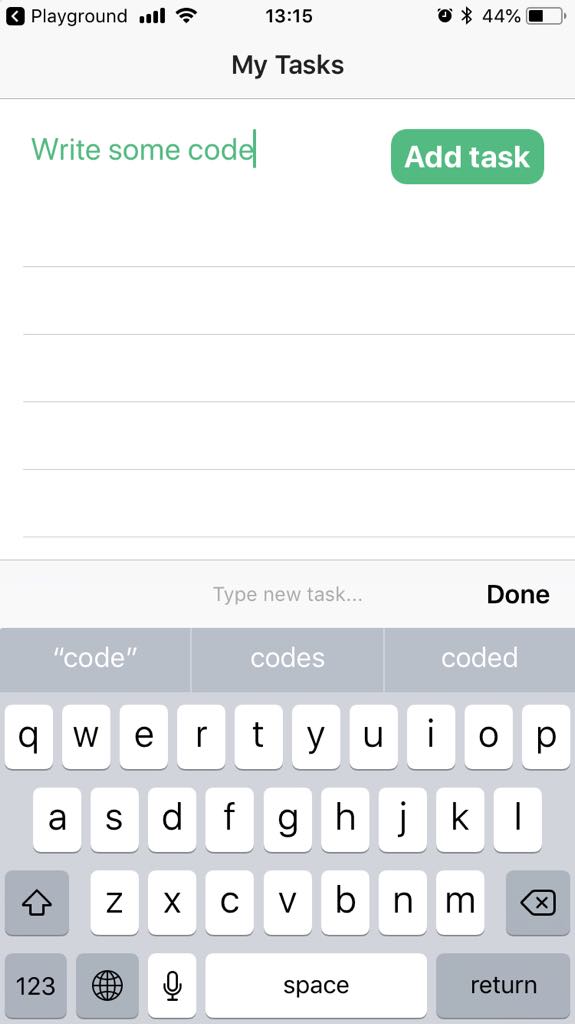
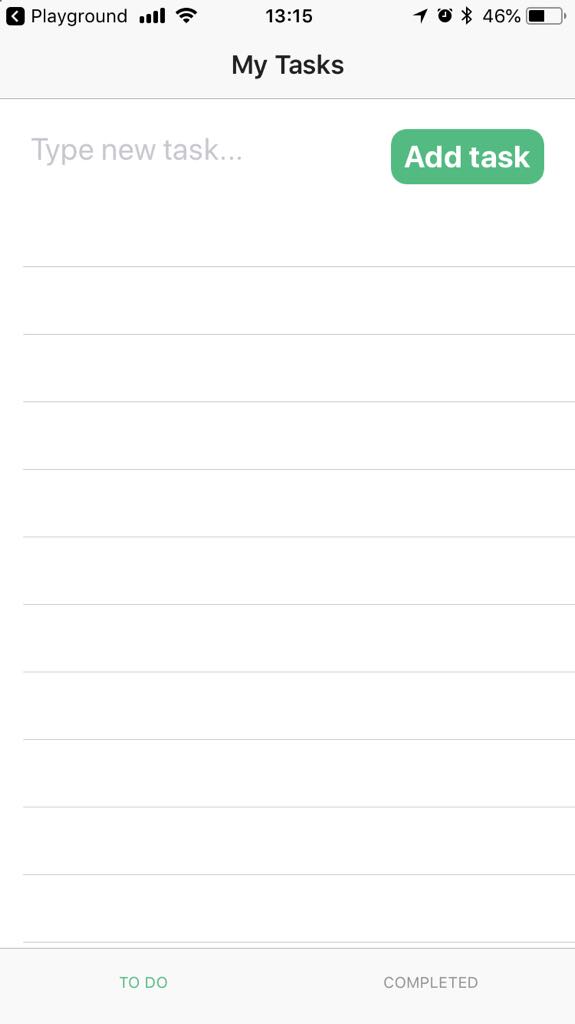
基本的なデザイン
このセクションでの進捗
このセクションを開始した時と終了したときの画面は以下の通りになります。
| 初期状態の画面 | タブ1 | タブ2 |
|---|---|---|
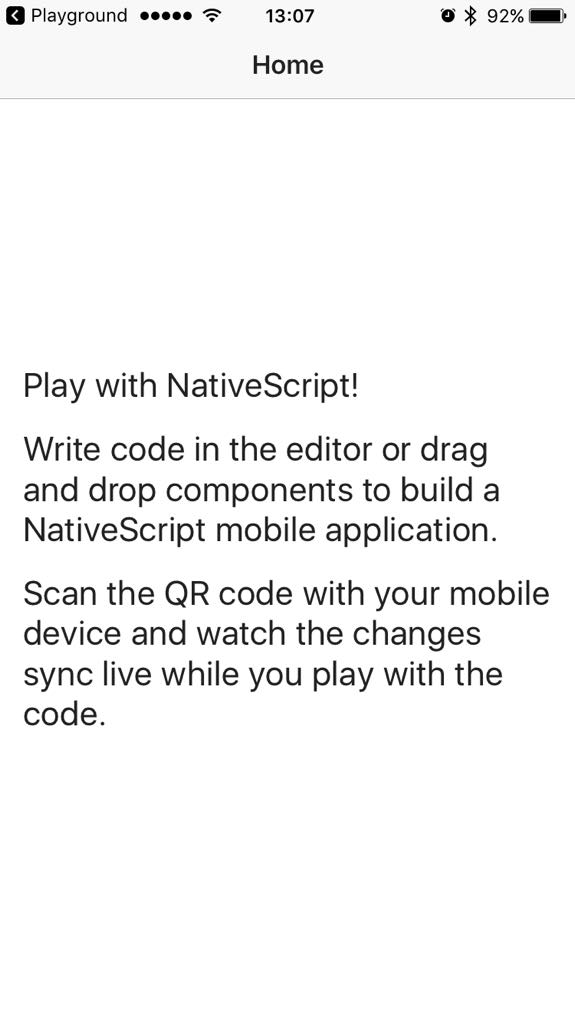 | 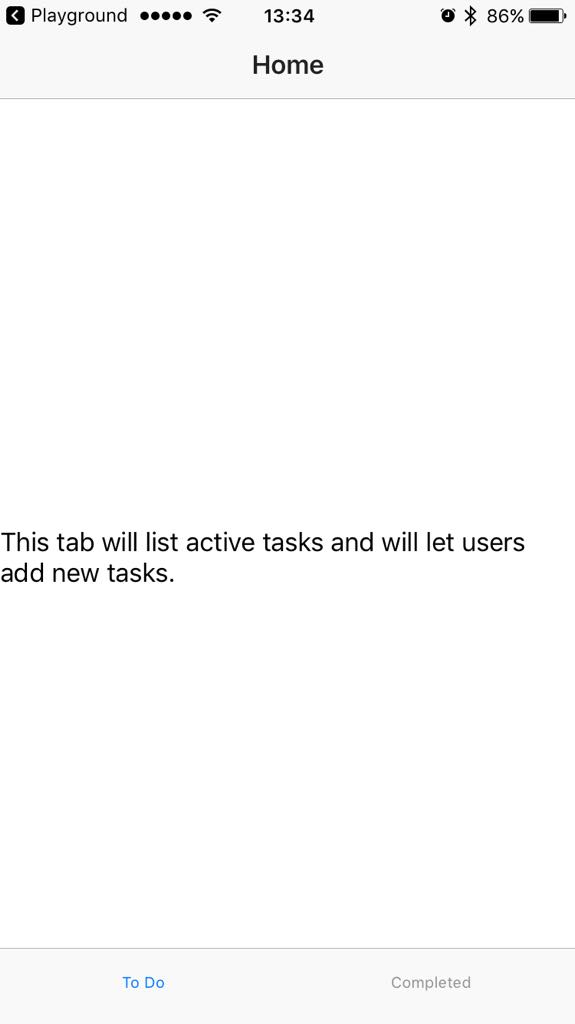 | 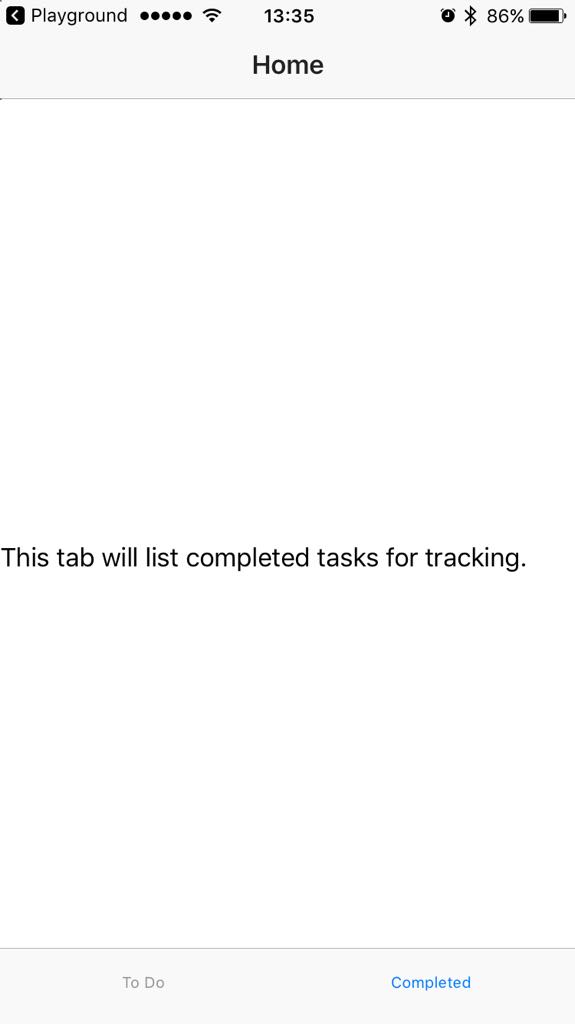 |
NativeScriptの基本を少し
<Page>エレメントは全てのNativeScript-Vueアプリにおいて、最上位層top-levelのUIエレメントです。他のすべてのUIエレメントはこの中にネストされます。
<ActionBar>エレメントは<Page>の中にアクションバーを表示します。<Page>の中では2つ以上の<ActionBar>を含むことはできません。
Typically, after the <ActionBar>, you will have navigation components (such as a drawer or a tab view) or layout components. これらのエレメントはアプリのレイアウトを管理し、その中に他のUIエレメントをどのように配置するのかを決定できるようにします。
Requirement implementation必要要件
2つのタブを持つアプリを作成するため、<TabView>コンポーネントを利用します。
<ActionBar>のtitleをアプリの目的に沿うよう変更します。- テンプレートを作成した際にデフォルトで記述される、
<ScrollView>ブロックとその中の全てのコンテンツを消去します。<ScrollView>コンポーネントはスクロールができるコンテンツの中で最上位層top-levelのUIエレメントになります。 - Drag and drop the その中に
<TabView>コンポーネントをドラッグ・ドロップします。 component in its place.
Playgroundはインデントを考慮したコードフォーマットを行います。 applies some code formatting, including taking care of indentation. However,フォーマとはコードの追加ノアとに行われうので、ブラウザの戻る機能ではフォーマットを消しますが追加されたコード自体には反映されません。 the formatting is applied after the insertion and using the browser's undo feature only reverts the formatting and not the insertion of code. <TabView>のheightを画面を満たすように設定します(100%に設定してください)。
Androidデバイス向けには,androidTabsPositionを追加して、その値をbottomにすることを考慮して下さい。そうしないと、タブが画面上部に表示されてしまいます。<TabViewItem>エレメントのタイトルを目的に装用に変更してください。
ここで大切なのは、タブのテキストの内容が<Label>コンポーネントにスタイリングもフォーマッティングもされず表示されることです。それぞれの<Label>コンポーネントでtextWrap="true"プロパティを適用することでテキストを見やすくしましょう。
このステージの最後では、<HelloWorld.vue>が以下のようになるはずです:
<template>
<Page class="page">
<ActionBar title="My Tasks" class="action-bar" />
<TabView height="100%" androidTabsPosition="bottom">
<TabViewItem title="To Do">
<Label text="This tab will list active tasks and will let users add new tasks." textWrap="true" />
</TabViewItem>
<TabViewItem title="Completed">
<Label text="This tab will list completed tasks for tracking." textWrap="true" />
</TabViewItem>
</TabView>
</Page>
</template>
<script>
export default {
data () {
return {
};
},
}
</script>
<style scoped>
.home-panel {
vertical-align: center;
font-size: 20;
margin: 15;
}
.description-label {
margin-bottom: 15;
}
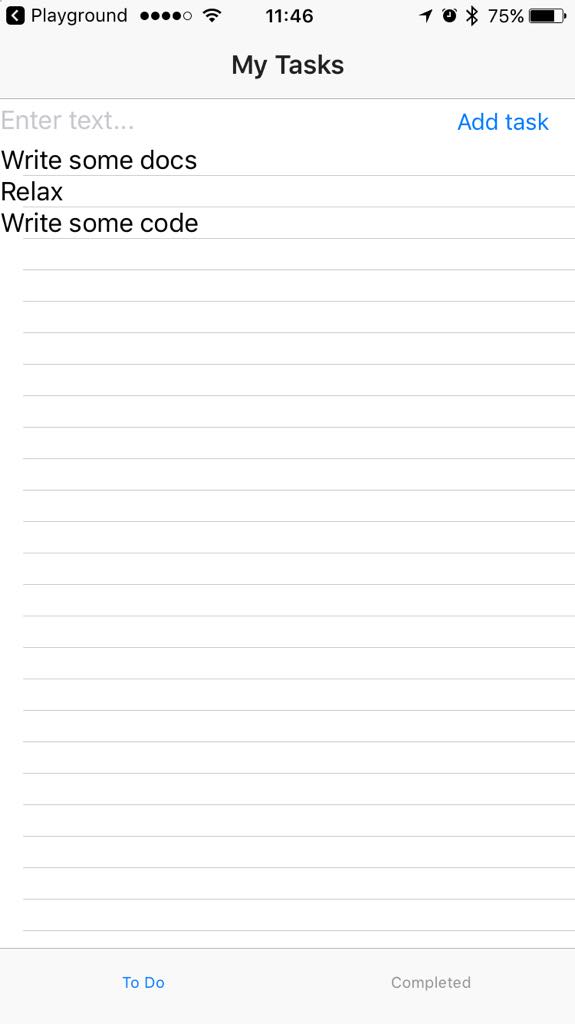
</style>基本機能: タスクの追加
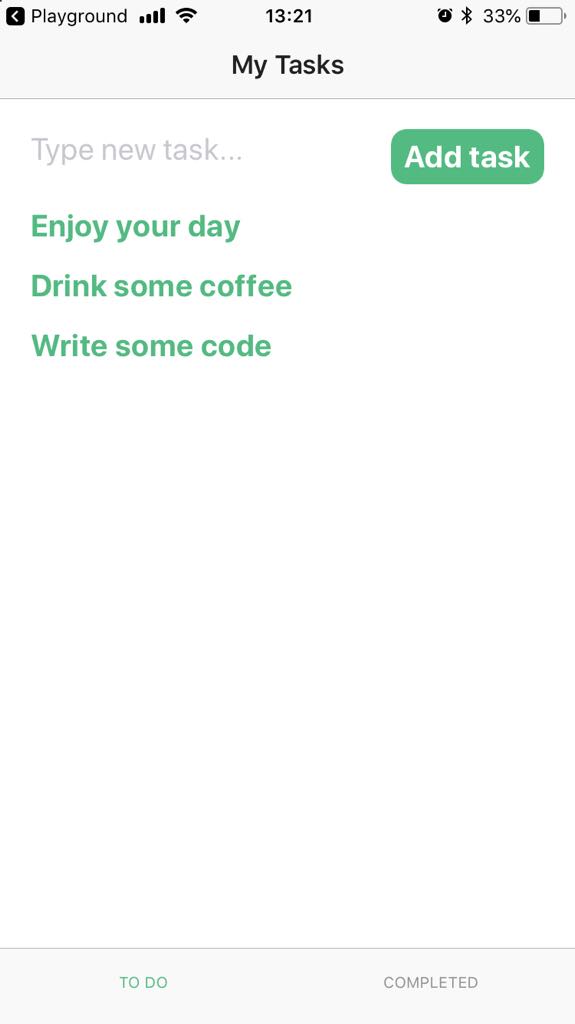
このセクションでの進捗
このセクションを開始した時と終了したときの画面は以下の通りになります。
| Initial screen | タブ1 - タスクがない時 | タブ1 - タスクがある時 |
|---|---|---|
| 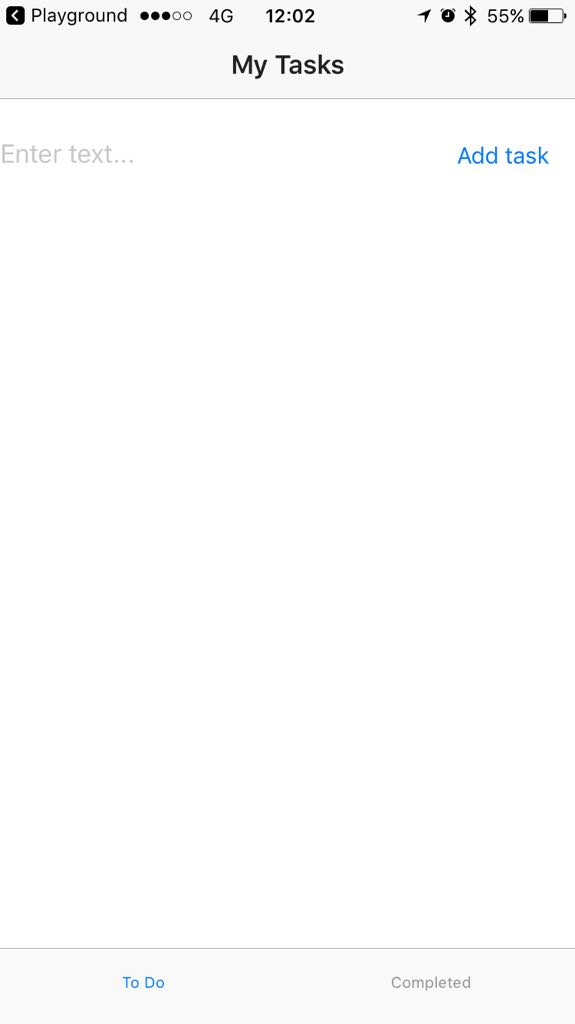 | 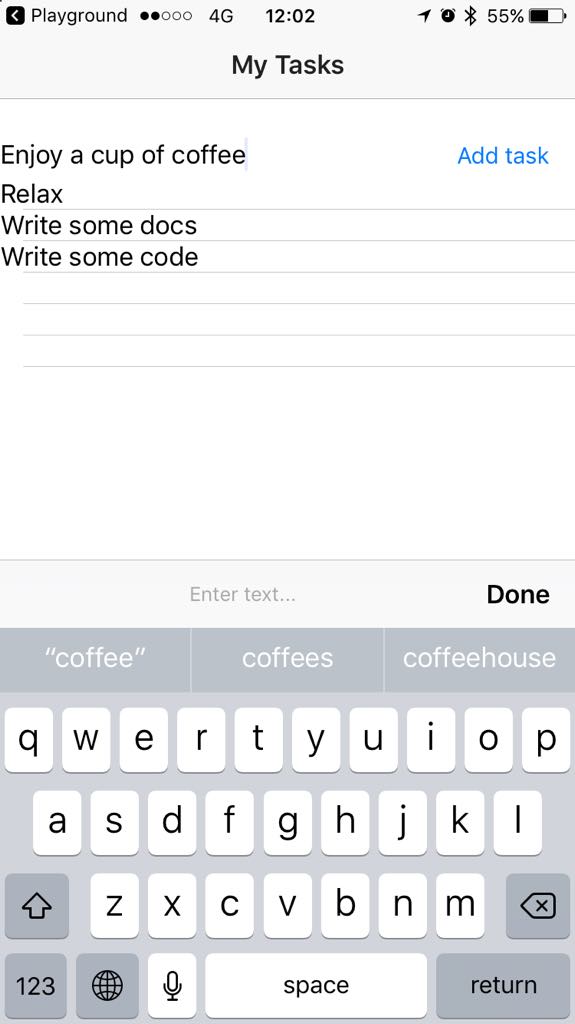 |
NativeScriptの基本を少し
layoutコンポーネントによって様々なUIウィジェットを整える事ができます。一つ以上のUIウィジェットを画面に配置する時ならいつも、使用可能なlayoutオプションを使いそうになるでしょう。<StackLayout>と<GridLayout>は基本なものですが、要素を個別に縦に並べたりテーブルのように並べたりすることを可能にする多くのオプションを持っています。 While the <StackLayout>は要素を一定の方向で並べる一方、<GridLayout>はグリッドの中で要素を表示する位置を直接指定します。
Requirement implementation
ページ上で<GridLayout>を、<TextField>と<Button>を整理するために使ってみましょう。The latter two form the input functionality of the app.
入力フィールドの下でタスクを表示するために<ListView>を用いましょう。
- 最初のタブの初めの
<TabViewItem>ブロックから<Label>コンポーネントを削除します。 - 最初のタブの
<TabViewItem>ブロックの中へ<StackLayout>コンポーネントをドラッグ&ドロップします。
デフォルトのコードだとカラフルな縦並びのスタックが作成されます。 <StackLayout>ブロックから全ての<Label>コンポーネントを削除します。- 最初のタブの
<StackLayout>ブロックの中に<GridLayout>コンポーネントをドラッグ&ドロップしてください。
デフォルトのコードだと、要素の位置指定とグリッドセルの結合方法を示すカラフルなテーブルが表示されます。 <GridLayout>ブロック内の全ての<Label>コンポーネントを削除します。<StackLayout>の設定をします。- background colorを削除します。
- widthとheightを
100%にします。
<GridLayout>の設定をします。- 初めのカラムが二番目のカラムの二倍になるような、二行×一列のグリッドを保つように指定します。
- 画面横幅を全て覆うようにグリッドのwidthに100%を指定します。
- グリッドのheightを25%に指定します。そうしないと、あとで追加する
<ListView>が<GridLayout>の上に覆いかぶさってしまいます。 - その他のグリッドに関する設定を消去します。
<GridLayout>ブロックの中に<TextField>と<Button>をドラッグ&ドロップします。
ここで初めてPlaygroundがJavaScriptのコードをソースコードに追加します。data()とmethodsブロックが<script>の下に追加されることに注意してください。次のステップで、これらの部分にいくつかのアプリの機能を実装するためのコードを追加することになります。- グリッドの下に
<ListView>をドラッグ&ドロップして下さい。
デフォルトのコードだと、<FlexboxLayout>の中に国と国旗アイコンのリストを生成します。 グリッドの中のエレメントの位置を設定する。
- 初めの行の初めの列の中に
<TextField>が設置されるように指定します。 - 二番目の行の初めの列の中に
<Button>が設置されるように指定します。
- 初めの行の初めの列の中に
<TextField>の設定- テキストフィールドを編集可能にします。
- キーボードのエンターキーでタスクを追加できるようにします。
<ListView>をクリーンアップして設定する。- この中にある
<Label>以外のネストしている全てのブロックを消去します。 - heightを75%に指定します。そうしない場合
<ListView>が<GridLayout>の上にかぶさります。 - Replace the
countries-related binding with a binding to タクティブなタスクの配列. <script>ブロック内で、国の配列を削除してアクティブなタスクのための空の配列を作成します。
- この中にある
<scripts>ブロック内で、ボタンのタップと以下のようなロジックを結びつけます。- 入力が空の文字列かどうかをチェックします。
- 新たに追加されたタスクのログをコンソールに出力します
- 新たに追加されたタスクをアクティブなタスクの配列に追加します。
unshiftを使ってページのトップに新たな要素を配置しましょう。 - 入力が終わったらテキストフィールドを空にします。
- 新たに追加されたタスクを画面に配置するために、
<ListView>の中で<Label>を使いましょう。
このstageの最後では、<HelloWorld.vue>は以下のさpンプルのようになっているはずです:
<template>
<Page class="page">
<ActionBar title="My Tasks" class="action-bar" />
<TabView height="100%" androidTabsPosition="bottom">
<TabViewItem title="To Do">
<!-- Positions an input field, a button, and the list of tasks in a vertical stack. -->
<StackLayout orientation="vertical" width="100%" height="100%">
<GridLayout columns="2*,*" rows="*" width="100%" height="25%">
<!-- Configures the text field and ensures that pressing Return on the keyboard produces the same result as tapping the button. -->
<TextField col="0" row="0" v-model="textFieldValue" hint="Type new task..." editable="true" @returnPress="onButtonTap" />
<Button col="1" row="0" text="Add task" @tap="onButtonTap" />
</GridLayout>
<ListView class="list-group" for="todo in todos" @itemTap="onItemTap" style="height:75%">
<v-template>
<Label :text="todo.name" class="list-group-item-heading" textWrap="true" />
</v-template>
</ListView>
</StackLayout>
</TabViewItem>
<TabViewItem title="Completed">
<Label text="This tab will list completed tasks for tracking." textWrap="true" />
</TabViewItem>
</TabView>
</Page>
</template>
<script>
export default {
methods: {
onItemTap: function(args) {
console.log('Item with index: ' + args.index + ' tapped');
},
onButtonTap() {
if (this.textFieldValue === "") return; // Prevents users from entering an empty string.
console.log("New task added: " + this.textFieldValue + "."); // Logs the newly added task in the console for debugging.
this.todos.unshift({ name: this.textFieldValue }); // Adds tasks in the ToDo array. Newly added tasks are immediately shown on the screen.
this.textFieldValue = ""; // Clears the text field so that users can start adding new tasks immediately.
},
},
data() {
return {
todos: [],
textFieldValue: "",
};
},
}
</script>
<style scoped>
.home-panel {
vertical-align: center;
font-size: 20;
margin: 15;
}
.description-label {
margin-bottom: 15;
}
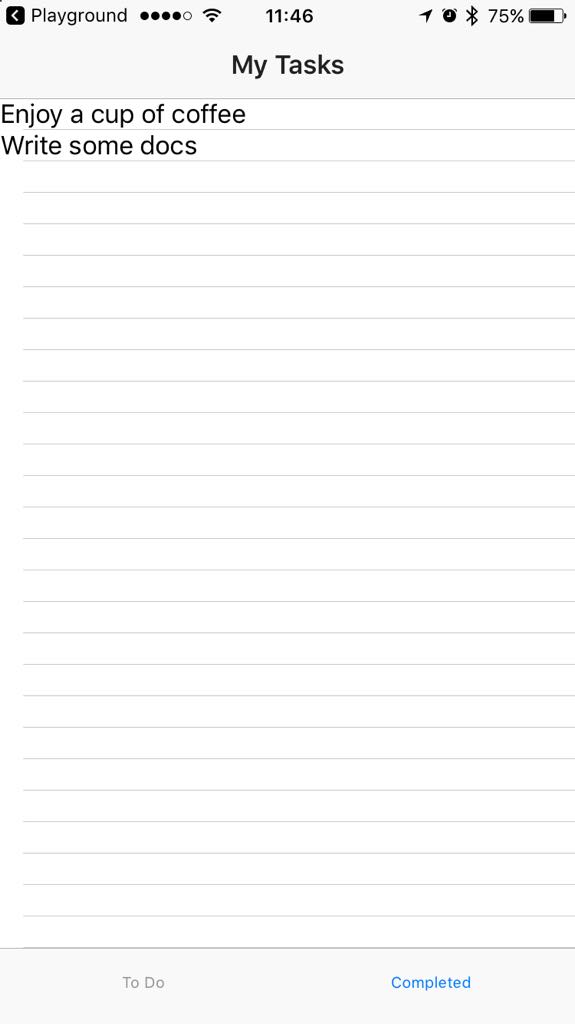
</style>基本的な機能: 閲覧、完了、To Do タブからタスクを削除する。
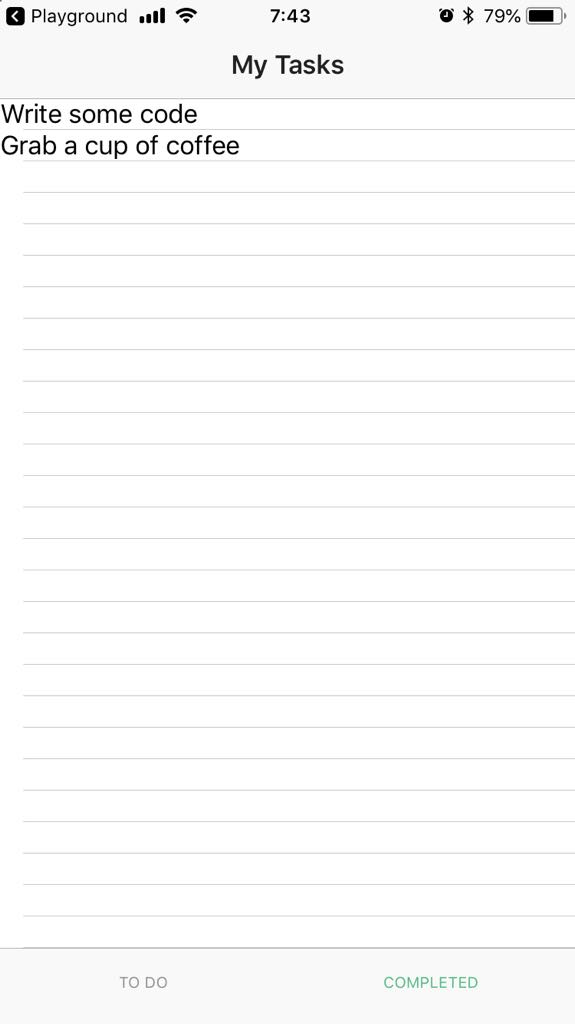
このセクションでの進捗
このセクションを開始した時と終了したときの画面は以下の通りになります。
| Tab 1 - Added tasks | Tab 1 - Item tapped | Tab 2 - Completed tasks |
|---|---|---|
| 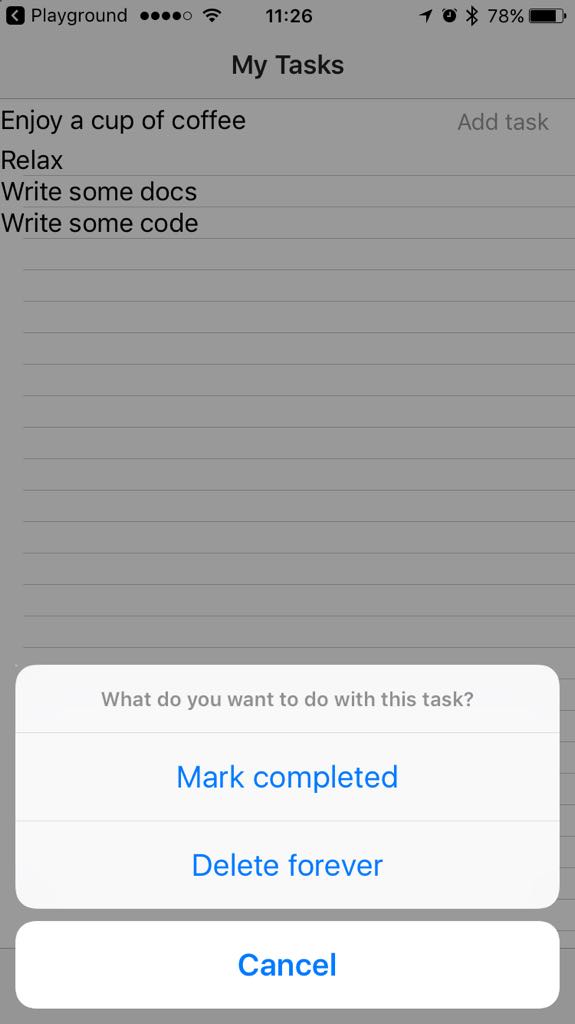 |  |
NativeScriptの基本を少し
画期的な<ListView>コンポーネントは、すべてのアイテムへのタップを検知し、イベントを実行します。ユーザが選択しアプリの機能を拡張できるよう、ダイアログをイベントに関連付けします。
dialogsは、アラート、アクション、プロンプト、ログイン、確認など、アプリに設定可能な複数のダイアログタイプを提供するモジュールです。この実装はaction()に依存し、ユーザがタスクを完了とマークか、リストから削除するかを選択できるようにします。
Requirement implementation
2番目の
<TabViewItem>タグの中から<Label>を削除します。ドラッグアンドドロップで<ListView>を追加し、タグの中を削除します。新しく追加した
<ListView>タグは完了したタスク(dones)が表示されます。<ListView class="list-group" for="done in dones" @itemTap="onDoneTap" style="height:75%"> <v-template> <Label :text="done.name" class="list-group-item-heading" textWrap="true" /> </v-template> </ListView>onItemTapメソッドの変更
action()ダイアログの表示デバッグのためユーザの選択をコンソールに記録
ユーザの選択をもとに、このメソッドは要素を
todos配列からdones配列に移動し、todos配列から要素を削除するか、ダイアログを削除します。splice()を使用して配列の中を移動し、unshift()を使い最近の完了タスクが上に表示されるようにします。onItemTap: function(args) { action('What do you want to do with this task?', 'Cancel', ['Mark completed', 'Delete forever']) .then(result => { console.log(result); // Logs the selected option for debugging. switch (result) { case 'Mark completed': this.dones.unshift(args.item); // Places the tapped active task at the top of the completed tasks. this.todos.splice(args.index, 1); // Removes the tapped active task. break; case 'Delete forever': this.todos.splice(args.index, 1); // Removes the tapped active task. break; case 'Cancel' || undefined: // Dismisses the dialog break; } }) },
この段階の最後で、<HelloWorld.vue>は次のサンプルのようになります。
<template>
<Page class="page">
<ActionBar title="My Tasks" class="action-bar" />
<TabView height="100%" androidTabsPosition="bottom">
<TabViewItem title="To Do">
<!-- Positions an input field, a button, and the list of tasks in a vertical stack. -->
<StackLayout orientation="vertical" width="100%" height="100%">
<GridLayout columns="2*,*" rows="*" width="100%" height="25%">
<!-- Configures the text field and ensures that pressing Return on the keyboard produces the same result as tapping the button. -->
<TextField col="0" row="0" v-model="textFieldValue" hint="Type new task..." editable="true" @returnPress="onButtonTap" />
<Button col="1" row="0" text="Add task" @tap="onButtonTap" />
</GridLayout>
<ListView class="list-group" for="todo in todos" @itemTap="onItemTap" style="height:75%">
<v-template>
<Label :text="todo.name" class="list-group-item-heading" textWrap="true" />
</v-template>
</ListView>
</StackLayout>
</TabViewItem>
<TabViewItem title="Completed">
<ListView class="list-group" for="done in dones" @itemTap="onDoneTap" style="height:75%">
  <v-template>
    <Label :text="done.name" class="list-group-item-heading" textWrap="true" />
  </v-template>
</ListView>
</TabViewItem>
</TabView>
</Page>
</template>
<script>
export default {
methods: {
onItemTap: function(args) {
action('What do you want to do with this task?', 'Cancel', ['Mark completed', 'Delete forever'])
.then(result => {
console.log(result); // Logs the selected option for debugging.
switch (result) {
case 'Mark completed':
this.dones.unshift(args.item); // Places the tapped active task at the top of the completed tasks.
this.todos.splice(args.index, 1); // Removes the tapped active task.
break;
case 'Delete forever':
this.todos.splice(args.index, 1); // Removes the tapped active task.
break;
case 'Cancel' || undefined: // Dismisses the dialog.
break;
}
})
},
onButtonTap() {
if (this.textFieldValue === "") return; // Prevents users from entering an empty string.
console.log("New task added: " + this.textFieldValue + "."); // Logs the newly added task in the console for debugging.
this.todos.unshift({
name: this.textFieldValue
}); // Adds tasks in the ToDo array. Newly added tasks are immediately shown on the screen.
this.textFieldValue = ""; // Clears the text field so that users can start adding new tasks immediately.
},
},
data() {
return {
dones: [],
todos: [],
textFieldValue: "",
};
},
}
</script>
<style scoped>
.home-panel {
vertical-align: center;
font-size: 20;
margin: 15;
}
.description-label {
margin-bottom: 15;
}
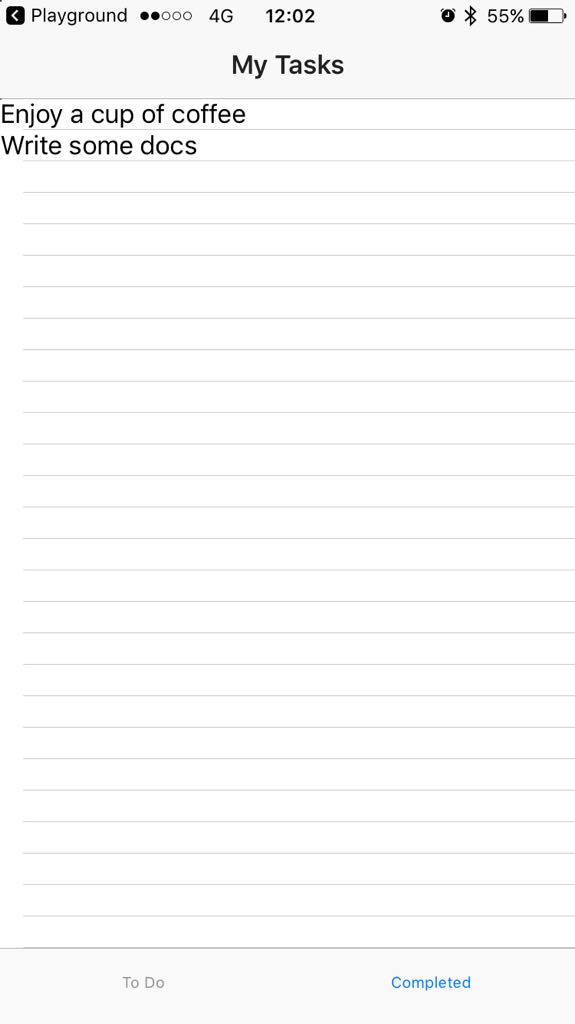
</style>基本的な機能: 表示、アクティブタスクへ戻す、完了タブからタスクを削除する。
このセクションでの進捗
このセクションを開始した時と終了したときの画面は以下の通りになります。
| Tab 2 - Completed tasks | Tab 2 - Item tapped | Tab 1 - Active tasks |
|---|---|---|
 |  |  |
NativeScriptの基本を少し
This implementation step does not require any additional knowledge.
Requirement implementation
2番目のタブでは onDoneTapメソッドを作成、変更をします。:
action()ダイアログの表示デバッグのためユーザの選択をコンソールに記録
ユーザの選択をもとに、このメソッドは要素を
todos配列からdones配列に移動し、todos配列から要素を削除するか、ダイアログを削除します。splice()を使用して配列の中を移動し、unshift()を使い最近の完了タスクが上に表示されるようにします。onDoneTap: function(args) { action('What do you want to do with this task?', 'Cancel', ['Mark to do', 'Delete forever']) .then(result => { console.log(result); // Logs the selected option for debugging. switch (result) { case 'Mark to do': this.todos.unshift(args.item); // Places the tapped completed task at the top of the to do tasks. this.dones.splice(args.index,1); // Removes the tapped completed task. break; case 'Delete forever': this.dones.splice(args.index, 1); // Removes the tapped completed task. break; case 'Cancel' || undefined: // Dismisses the dialog break; } }) },
この段階の最後で、<HelloWorld.vue>は次のサンプルのようになります。
<template>
<Page class="page">
<ActionBar title="My Tasks" class="action-bar" />
<TabView height="100%" androidTabsPosition="bottom">
<TabViewItem title="To Do">
<!-- Positions an input field, a button, and the list of tasks in a vertical stack. -->
<StackLayout orientation="vertical" width="100%" height="100%">
<GridLayout columns="2*,*" rows="*" width="100%" height="25%">
<TextField col="0" row="0" v-model="textFieldValue" hint="Type new task..." editable="true" @returnPress="onButtonTap" />
<!-- Configures the text field and ensures that pressing Return on the keyboard produces the same result as tapping the button. -->
<Button col="1" row="0" text="Add task" @tap="onButtonTap" />
</GridLayout>
<ListView class="list-group" for="todo in todos" @itemTap="onItemTap" style="height:75%">
<v-template>
<Label :text="todo.name" class="list-group-item-heading" textWrap="true" />
</v-template>
</ListView>
</StackLayout>
</TabViewItem>
<TabViewItem title="Completed">
<ListView class="list-group" for="done in dones" @itemTap="onDoneTap" style="height:75%">
<v-template>
<Label :text="done.name" class="list-group-item-heading" textWrap="true" />
</v-template>
</ListView>
</TabViewItem>
</TabView>
</Page>
</template>
<script>
export default {
methods: {
onItemTap: function(args) {
  action('What do you want to do with this task?', 'Cancel', ['Mark completed', 'Delete forever'])
    .then(result => {
      console.log(result); // Logs the selected option for debugging.
      switch (result) {
        case 'Mark completed':
          this.dones.unshift(args.item); // Places the tapped active task at the top of the completed tasks.
          this.todos.splice(args.index, 1); // Removes the tapped active  task.
          break;
        case 'Delete forever':
          this.todos.splice(args.index, 1); // Removes the tapped active task.
          break;
        case 'Cancel' || undefined: // Dismisses the dialog
          break;
      }
    })
},
onDoneTap: function(args) {
  action('What do you want to do with this task?', 'Cancel', ['Mark to do', 'Delete forever'])
    .then(result => {
      console.log(result); // Logs the selected option for debugging.
      switch (result) {
        case 'Mark to do':
          this.todos.unshift(args.item); // Places the tapped completed task at the top of the to do tasks.
          this.dones.splice(args.index,1); // Removes the tapped completed task.
          break;
        case 'Delete forever':
          this.dones.splice(args.index, 1); // Removes the tapped completed task.
          break;
        case 'Cancel' || undefined: // Dismisses the dialog
          break;
      }
    })
},
onButtonTap() {
if (this.textFieldValue === "") return; // Prevents users from entering an empty string.
console.log("New task added: " + this.textFieldValue + "."); // Logs the newly added task in the console for debugging.
this.todos.unshift({
name: this.textFieldValue
}); // Adds tasks in the ToDo array. Newly added tasks are immediately shown on the screen.
this.textFieldValue = ""; // Clears the text field so that users can start adding new tasks immediately.
},
},
data() {
return {
dones: [],
todos: [],
textFieldValue: "",
};
},
}
</script>
<style scoped>
.home-panel {
vertical-align: center;
font-size: 20;
margin: 15;
}
.description-label {
margin-bottom: 15;
}
</style>アドバンスデザイン: テキストエリアとボタンのスタイル
このセクションでの進捗
このセクションを開始した時と終了したときの画面は以下の通りになります。
| Tab 1 - No style | Tab 1 - Styled | Tab 1 - Styled |
|---|---|---|
|  |  |
NativeScriptの基本を少し
NativeScriptとVue.jsを使う場合、アプリのデザインはCSSで行うことができます。アプリ全体のCSSが最初に適用され、プロジェクトのルートにあるapp.cssで処理がされます。このチュートリアルでは、アプリ全体のCSSに関しては説明しません。Stylingを参照してください。
スコープCSSは現在のコンポーネントにのみ適用され、HelloWorld.vueの<style scoped>に反映されます。このチュートリアルは、スコープCSSとインラインCSSに依存しています。Scoped CSSも観ておくといいでしょう。
タイプセレクタを使用すると、UIコンポーネントを選択し、それにスタイルを適用できます。タブビューを選択するにはTabViewを使用するように、タイプセレクタを選択するには、コードで提供されているコンポーネント名を使います。
Requirement implementation
テキストエリアのデザイン
HelloWorld.vueの中の<style scoped>で、<TextField>のfont size、color、marginを変更しましょう。
TextField {
  font-size: 20;
  color: #53ba82;
  margin-top: 10;
  margin-bottom: 10;
  margin-right: 5;
  margin-left: 20;
}
ボタンをデザイン
<style scoped>で、ボタンのデザインを作成します。角が丸いユニークなボタンを作成しましょう。
Button {
  font-size: 20;
  font-weight: bold;
  color: white;
  background-color: #53ba82;
  height: 40;
  margin-top: 10;
  margin-bottom: 10;
  margin-right: 10;
  margin-left: 10;
  border-radius: 20px;
}
Advanced design: Styled tab navigation
このセクションでの進捗
このセクションを開始した時と終了したときの画面は以下の通りになります。
| Tabs - No style | Tabs Styled |
|---|---|
|  |
NativeScriptの基本を少し
<TabView>はすぐに使えるスタイルプロパティを提供しています。タブタイトルの文字を変形(textTransform)させたり、フォントサイズ、色(tabTextFontSize, tabTextColor, selectedTabTextColor)を変更することができます。タブの背景色(tabBackgroundColor)を変更することも可能です。
Requirement implementation
選択されたタブタイトルの色、フォントサイズを変更する
HelloWorld.vueの中の<TabView>にselectedTabTextColor、tabTextFontSizeプロパティを追加します。
<TabView height="100%" androidTabsPosition="bottom" selectedTabTextColor="#53ba82" tabTextFontSize="15" >文字の変形
textTransformプロパティをタブに追加していきましょう。このプロパティは<TabViewItem>のみに適応できます。
<TabViewItem title="To Do" textTransform="uppercase" ><TabViewItem title="Completed" textTransform="uppercase">Advanced design: Styled active tasks
このセクションを開始した時と終了したときの画面は以下の通りになります。
| Active tasks - No style | Active tasks - no separator | Active tasks - styled active tasks |
|---|---|---|
|  |  |
NativeScriptの基本を少し
<ListView>と<Label>は、リストや<template>内のテキストラップや、要素をコントロールする画期的なスタイルプロパティを持っています。文字のフォントスタイル、スタイル、色、ポジションをCSSを使って変更するために<style scoped>を使うのです。
特にアクティブなタスクのような実装に対してスタイルを適用させたいなら、<Label>にidを設定することができます。
Requirement implementation
アクティブなタスクを示す
<Label>にidを設定し、折り返しを有効にします。折り返しを有効にすると、長いテキストがリストに正しく表示されるようになります。<Label id="active-task" :text="todo.name" class="list-group-item-heading" textWrap="true" /><ListView>にseparatorColorプロパティを追加し、transparentを指定します。この方法で、仕切りが表示されなくなります。<ListView class="list-group" for="todo in todos" @itemTap="onItemTap" style="height:75%" separatorColor="transparent" >アクティブなタスクに対して、スタイルを
<style scoped>で適用させます。このページのテキストにフォントサイズ、色、パディング、ポジションを設定します。自分好みになるまで、パディングとマージンをいじってみましょう。#active-task { font-size: 20; font-weight: bold; color: #53ba82; margin-left: 20; padding-top: 5; padding-bottom: 10; }
Advanced design: Styled completed tasks
このセクションを開始した時と終了したときの画面は以下の通りになります。
| Completed tasks - No style | Completed tasks - Styled |
|---|---|
 | 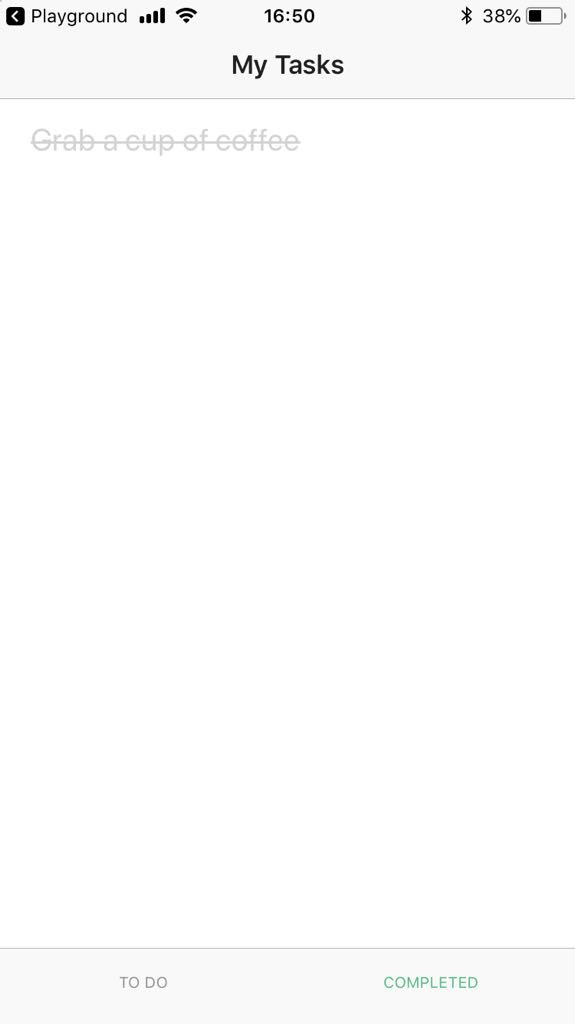 |
NativeScriptの基本を少し
このセクションではNative Scriptの基礎的な知識から、高度なデザイン:アクティブなタスクのデザインまでを学びます。
Requirement implementation
完了したタスクを示す
<Label>にidを設定し、折り返しを有効にします。折り返しを有効にすると、長いテキストがリストに正しく表示されるようになります。<Label id="completed-task" :text="done.name" class="list-group-item-heading" textWrap="true" /><ListView>にseparatorColorプロパティを追加し、transparentを指定します。この方法で、仕切りが表示されなくなります。<ListView class="list-group" for="done in dones" @itemTap="onDoneTap" style="height:75%" separatorColor="transparent">完了したタスクに対して、スタイルを
<style scoped>で適用させます。このページのテキストにフォントサイズ、色、パディング、ポジションを設定します。自分好みになるまで、パディングとマージンをいじってみましょう。#completed-task { font-size: 20; color: #d3d3d3; margin-left: 20; padding-top: 5; padding-bottom: 10; text-decoration: line-through; }